That's right! Ok, my sister's first reaction was "Ehw, that's disgusting!". But I didn't say that I wasn't washing my hair anymore, just that I had stopped using shampoo and conditioner.
The revolution to change the world does have to start from our own households and so....I started to think....I have to take these life-style choices a step further. It's good to start eating in a conscientious way, trying to use the car the least possible...but what about all the chemicals that
a) we put onto our skins: our skin is the largest organ of our body and it DOES absorb everything you put on it! So look at the ingredients of soaps, shampoos, toothpastes in your bathroom, and just think of what your poor body, blood and organs have to deal with.
b) wash down into the drains, into rivers and oceans, into crops, the air we breathe...it's all a vicious cycle.
It really hit me when my mother walked into the bathroom and said: "Dr Mercola says: 'If you can't eat it, then don't put it on your skin.'"
Simple. If I can't eat it, I'm not putting it onto my skin. So let's get to it, it's as simple as this:
"SHAMPOO":
- baking soda
- water
You can either leave the consistency quite "pastey", or you can actually liquify and pour it onto your head (if so, use hot water to dilute the bicarb). There will be no bubbles, no allluring perfumes of tropical plants....but it cleans your hair! I have long hair, so I preferred to keep the consistency like a paste. You don't need to apply it onto the whole length of your hair, because that really isn't the part of the hair that needs washing.
I have found other recipes using chick-pea flour, buckweat flour....you can really start experimenting. I tried the chick-pea flour this morning and found it to be a bit too drying for my hair (but might work for you if you have very oily hair).
So that's the shampoo done for you, healthier for you, for the environment, and for your wallets.
"CONDITIONER":
- apple-cider vinegar
- water
Mix the two together: I emptied out an old transparent bath-gel container and used that. Put in about half a cup of vinegar, and the rest water. You "rinse" your hair with this after you've washed the bicarbonate soda out of your hair. The vinegar removes any residue from your hair and....it stinks. Yes, and it really burns if it gets into your eyes BUT fear not! Once the hair dries the smell evaporates, and it leaves it nice and soft. Then use water to rinse this out.
So that's how to wash your hair with 3 ingredients that you can easily buy in your supermarket spending very little money and being eco and self-friendly.
P.S. Brush your hair BEFORE washing it, helps with the tangles. You could also try putting some oils into your hair if you want to give it a bit of nutritious love.
June 5, 2011

May 8, 2010
Birds (literally) flying into my life!
I often speak to my students about the law of attraction....and manifestation....what are you attracting into your life? What vibration frequency are you emitting to attract people and situations into your life?
Well, here's a new one: I attracted a budgie into my life...well, not exactly. My mum attracted a budgie into my life....which leads me to say "Be careful of what your mother wishes, because if she doesn't go out to claim it herself, it may just fly to you!"
I was in an ice-cream shop in Milano on an innocent Friday afternoon when a budgie suddenly flew into the shop and amongst the kids and the chaos allowed me to pick him up. What to do, what not to do....children telling me I should call him Filippo....I end up bringing him home thinking how I'd break the news of the new entry into our house. What she says is: "It's a few days I've been thinking about getting a budgie."
She obviously had no intention of actually going to buy one, so this little guy had to leave his previous owners, risk his life in Milano traffic and fly directly to me.
After 3 weeks of looking at him and desperately trying to train him to sit on my finger for more than 5 seconds, I decided to get him a friend - so there are now two budgies sharing our home: Aku and Sakhi.
The day I get them to do something special I may even post a video, but in the mean-time....
...just think if she'd wished for an albatros!
Well, here's a new one: I attracted a budgie into my life...well, not exactly. My mum attracted a budgie into my life....which leads me to say "Be careful of what your mother wishes, because if she doesn't go out to claim it herself, it may just fly to you!"
I was in an ice-cream shop in Milano on an innocent Friday afternoon when a budgie suddenly flew into the shop and amongst the kids and the chaos allowed me to pick him up. What to do, what not to do....children telling me I should call him Filippo....I end up bringing him home thinking how I'd break the news of the new entry into our house. What she says is: "It's a few days I've been thinking about getting a budgie."
She obviously had no intention of actually going to buy one, so this little guy had to leave his previous owners, risk his life in Milano traffic and fly directly to me.
After 3 weeks of looking at him and desperately trying to train him to sit on my finger for more than 5 seconds, I decided to get him a friend - so there are now two budgies sharing our home: Aku and Sakhi.
The day I get them to do something special I may even post a video, but in the mean-time....
...just think if she'd wished for an albatros!
Tooth Scrub
Usual tooth karma creeping up on me....so always on the look-out for more natural ways of looking after my teeth.
So here's a very simple scrub you can use for your teeth which will help keep them clean and invigorate the gums. All you need is white clay (powdered form: argilla), and tea-tree oil. After you've brushed your teeth (and why not, flossed as well) just take a table-spoon of clay in your hand and 3 drops of tea-tree oil (check it's a good quality oil that can be used internally, not the cheap stuff you buy for burning in oil burners!) and just mix the two together in the palm of your hand. 

Then, using your finger, rub your teeth and gums with it...mmmm....doesn't it look looooovely! You'll find that you will start salivating profusely (slight exhageration), so just use this super-natural mix of stuff to swoosh it around in your mouth a bit before spitting it out.
You can use this scrub every day: it's a natural antisceptic and after the initial investment in the ingredients, it's cheap and long-lasting.
December 13, 2009
Arborio Rice & Chickpea Cream
 Rice Ingredients (Serves 4)
- wholemeal Arborio rice (4 handfuls / person)
- salt
- olive oil
- fresh parsley
Procedure:
Cook the rice as per the instructions on the box. When the rice is ready, let it rest for five minutes by covering the pot with a lid, and then add the olive and fresh parsley leaves, which you will have previously washed and prepared.
THE ART OF COOKING RICE
Never mix the rice when it’s cooking: the cooked grains will automatically rise to the top when they are ready, allowing the less cooked ones to go to the bottom. Interfering in this process by mixing the rice will actually spoil its very autonomous and intelligent cooking procedure!
Never drain rice: do wash it before cooking by rinsing it a few times in a sieve. Put the exact amount of water needed for cooking, and let the rice absorb this water. Should the rice require more water, boil some water separately and add that water to the pot (never add cold water). It does take some practice to get the right amount of water first off, but you will get it eventually!
Chickpea Cream Ingredients (Serves 4)
- 200g chickpea flakes (you can find them in health-food stores and some specialized super-markets)
- 3 ripe tomatoes
- ½ a leek
- a chunk of fresh ginger
- chilly
- herbal salt
- olive oil
- juice of half a lemon
Procedure:
Chop up the leek as well as the fresh tomatoes. Heat some olive oil in a pot, and then add the leek to stir fry slightly. Then add the tomatoes, the chick-peak flakes, and cover with water. When the water starts to boil, add the herbal salt, chilly, and the ginger. The chickpea flakes only take about 15 minutes to cook, so when they look nice and soft, process all the ingredients with a hand-held food blender until it has reached a creamy consistency. If it seems too runny to you, you can keep it cooking until the excess water evaporates; if, on the other hand, it seems too thick, you can add some boiling hot water until it reaches the desired consistency.
For a tangy swing, drizzle some fresh lemon juice on your chickpea cream once you’ve served it on the plate. Lemon juice, and hence Vitamin C, is an essential element in iron absorption, so it’s especially important to combine it (in whatever form you should choose) with your legume dishes.
Pumpkin Boats

Ingredients:
- 1 whole pumpkin
- 1 large zucchini
- ½ a leek
- ½ a large eggplant
- a large piece of fresh ginger
- fresh sage leaves
- olive oil
- salt (herbal salt is preferable)
- chili powder (as per one’s taste)
Procedure:
Cut the pumpkin into slices and remove the seeds leaving the skin on. Place them in an oven dish and bake in the oven at 180oC until soft.
In the mean time, cut the zucchini and eggplant into very small cubes, as well as the leek and the sage leaves. Heat some olive oil in a pan, and then lightly stir-fry the sage leaves and leek – when golden, add the zucchini, and then the eggplant. Remember when stir-frying vegetables: if you cook the vegetables at a high heat, they will retain the water and remain crunchier. If you instead cook them at a lower heat, they will go mushy and lose a lot of their taste. Add the herbal salt, fresh ginger (which you will have cut up into small pieces), and chili powder.
Simply place the vegetables onto each pumpkin slice, pressing them slightly down into the pumpkin. Replace them in the oven for another 15 minutes, and then ENJOY!
In the mean time, cut the zucchini and eggplant into very small cubes, as well as the leek and the sage leaves. Heat some olive oil in a pan, and then lightly stir-fry the sage leaves and leek – when golden, add the zucchini, and then the eggplant. Remember when stir-frying vegetables: if you cook the vegetables at a high heat, they will retain the water and remain crunchier. If you instead cook them at a lower heat, they will go mushy and lose a lot of their taste. Add the herbal salt, fresh ginger (which you will have cut up into small pieces), and chili powder.
Simply place the vegetables onto each pumpkin slice, pressing them slightly down into the pumpkin. Replace them in the oven for another 15 minutes, and then ENJOY!
ENJOY: from the French “en joie”, literally “in joy”: pumpkin is a very joyful vegetable with its vibrant orange color. It is truly a gift of nature, especially as the season gets colder; you want to boost your body up with orange foods! Pumpkins are rich in antioxidants and beta-carotene, which will strengthen your immune system. Beta-carotene converts to Vitamin A and helps reduce the risk of cancer and other dangerous diseases.
IN JOY! For body, mind, and soul.
December 3, 2009
Broccoli Kamut Pasta

I just love broccoli! And I love Kamut! So here's the two in divine culinary union.
I must admit that when I hold a broccoli branch (is that how you'd call it?), I feel like a bride holding a bouquet....should a sweet prince ever greet me with a broccoli bouquet I'd be flattered (and taken aback by such original creativity!)
Ingredients
(these quantities are roughly for 1 person....use your instinct)
- 1 medium-small broccoli head
- 80g (?) of kamut pasta (you can of course use any pasta for this dish, but kamut pasta has a wonderful taste and is nutritionally much richer than other types of pasta)
- herbal salt (or normal salt)
- chilli powder
- olive oil
Prepare the broccoli into bite-size pieces. I like to use the "trunk" as well - you just need to cut off the hard green exterior and use the middle bit, which is light in color.
Bring to the boil a pot of water, and then place both pasta and broccoli in together. After roughly 10 minutes (check cooking time on the packet of pasta), drain off the water, replace the pasta and broccoli in the pot, add olive oil, a bit of herbal salt, a dash of chilli powder...mix mix mix....this gets the broccoli nice and....mmmm...spread out. Serve! I find this dish really heart warming, especially on a cold winter's day.
Red Quinoa, Radicchio, and Baked Vegetables

Ingredients:
- red quinoa
- radicchio
- season vegetables (I used eggplant, pumpkin, red pepper, leek, zucchini, fresh ginger)
- fresh sage leaves
- olive oil
- salt
- curry powder (optional)
- any other spices you may like: chilli, turmeric
Prepare the quinoa following the instructions on the packet. Red quinoa is very tasty, so depending on your taste you can add a little salt if you like. A drop of olive oil is always good. Once cooked, you can give the quinoa a nice shape by putting it into a small bowl and then tipping it onto a plate (if you do want to do this, the quinoa is the first thing you have to put on the plate...).
Prepare the vegetables into chunky chunks, preheat oven to 180C. In the meantime, place the sage leaves into a blender with some salt and whatever spice tickles your fancy, and olive oil. Make it quite runny so that you can mix the vegetables with it in a bowl, and then place them in the oven dish for baking. You can also add other herbs to this if you like, such a as rosemary, origano, parsley. I'm not sure how long the vegetables took to cook....you can tell by looking at them!
In a separate dish, place the radicchio which you will have washed and cut into four. Simply place in the oven with a little olive oil and top. They don't take long to cook, so just keep an eye on them.
Enjoy!
Post Scriptum: there is another green preparation on the plate in the photo: I won't put the recipe for that because I added burnt sesame seeds.....eeewh.....a flop!
November 23, 2009
Hearty Quinoa and Pumpkin Soup

Here's a very easy and warming soup recipe for you:
Ingredients:
- 500g pumpkin
- 1 courgette/zucchini
- 1/2 leek
- 70g quinoa
- 30-40g fresh ginger
- 50g sunflower seeds
- a bunch of fresh sage leaves
- salt and spices to taste
- olive oil
Procedure
Prepare the vegetables into small cubes...because it's nice to eat tidily. I really don't like it when you get those soups (which do taste nice) but that have HUGE pieces of cabbage that splash all the way across your face and down your chin. It's hard to be lady-like. This is my capricorn coming out. I'm very precise with cutting my vegetables.
Heat some olive oil in a pot and add the leek and sage leaves. Add the sunflower seeds so that they may toast in the oil as well. Wait until the sage leaves have literally cooked in the oil, and the leek is golden brown.
Add the rest of the vegetables and cover with water. Bring to the boil, add salt and whatever spices you like (I personally like turmeric and a little chilli powder, especially for heating up if it's a cold winter's night).
In the mean time prepare the fresh ginger by cutting it into small small pieces. Once the soup has cooked (check the pumpkin, and you will know when it's ready), add the ginger, cover the pot with a lid, and just let it brew for another ten minutes.
It is then ready!
Finished Stairs!

The stairs are indeed finished....finally! One of them is a bit mucked up (hadn't made the right consistency of cement), but the rest are nice....and they give you a nice massage as you walk on them. Check here for how to do it yourself.
November 17, 2009
Apple and Chestnut Cake
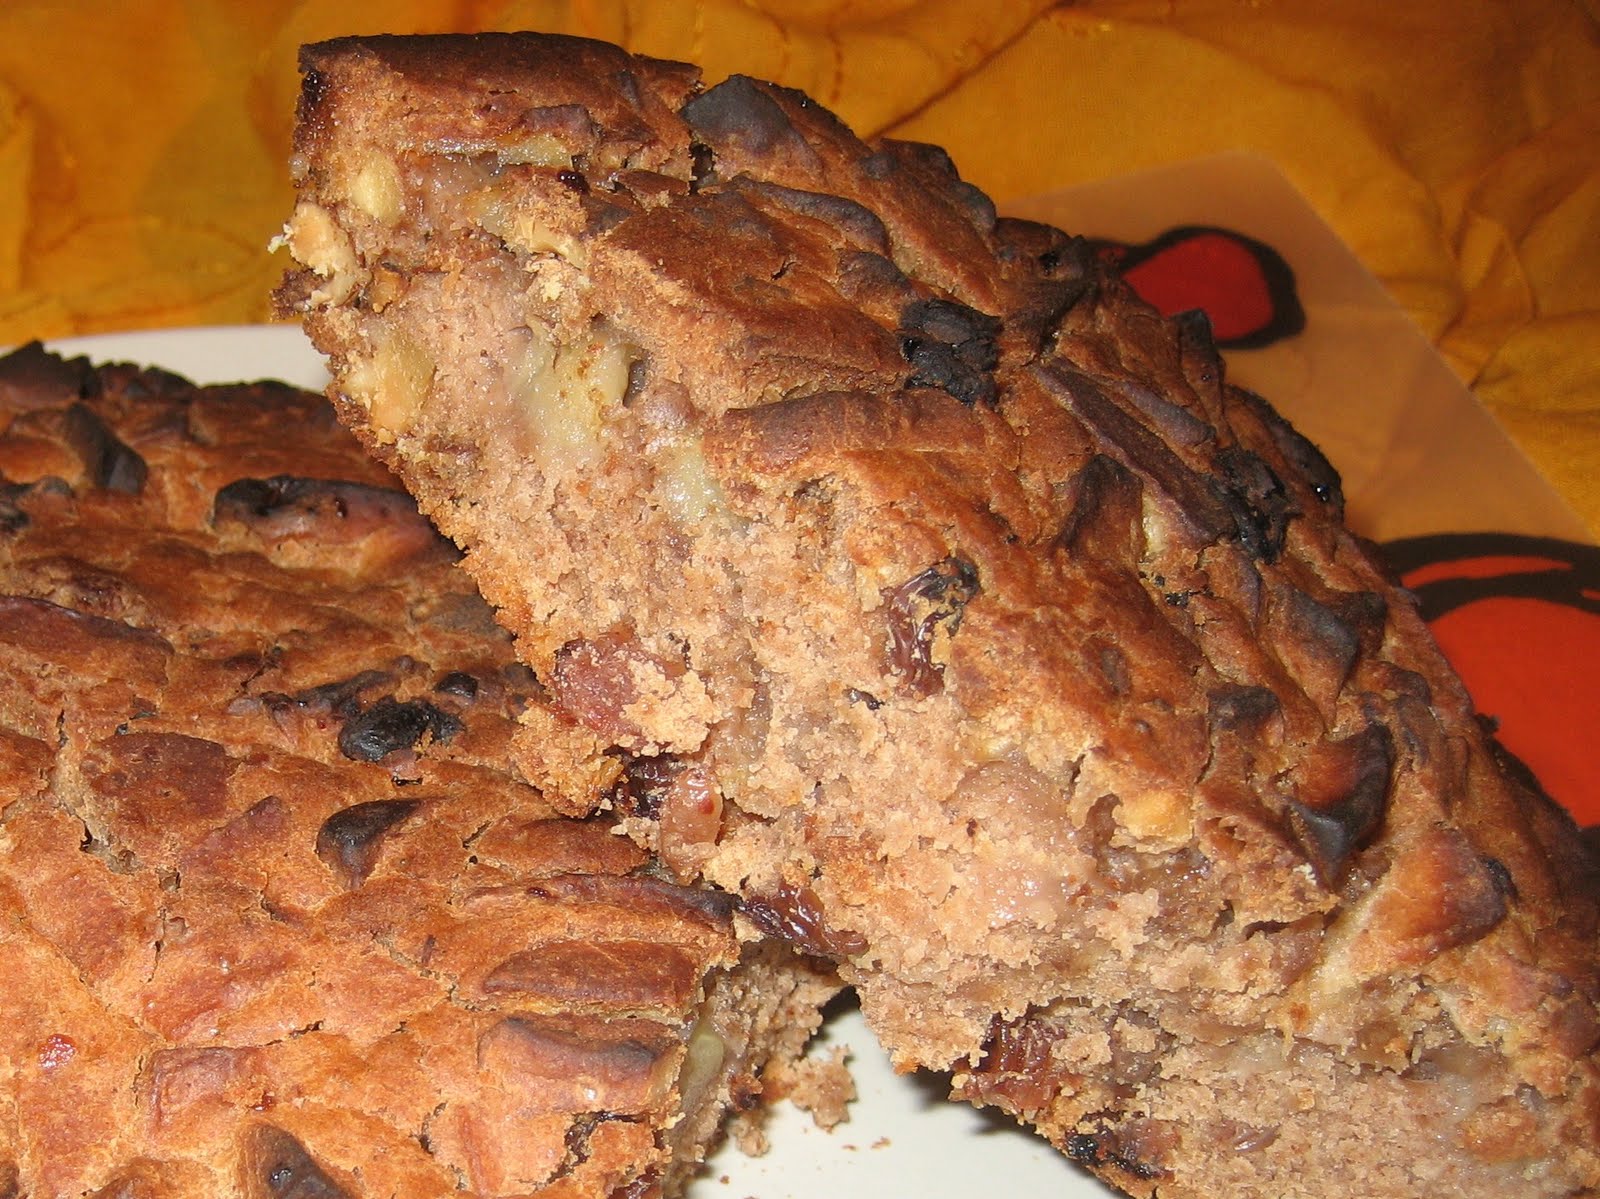
Since I had a lot of studying to do, I thought I'd bake a cake instead. Following past baking disasters, I think I've almost reached a state of bakery enlightenment...as the great philosophers say, "You bake, you learn". This is a wonderful autumn recipe (I'm only saying this because it's autumn now....but I'm sure I'll bake it in the other seasons as well).
Ingredients
- 100g wholemeal spelt flour
- 100g Maizena (maize/corn starch)
- 50g Chestnut flour
- 100g brown sugar
- a teaspoon of Cremor Tartar (or yeast equilivalent)
- 100g raisins
- 50g chopped walnuts
- 1 apple, peeled and cut into small pieces
- cinnamon and nutmeg (to your heart's desire)
- 3 tablespoons of maize/corn oil (or olive oil)
- roughly 230 ml water
Procedure
Preheat oven to 180C. Mix together all the dry ingredients, and then add the oil and water. Mix....the mixture should be runny enough to just be poured into the baking tray. Remember to grease the baking tray before-hand.
Bake for 50min-1hour without opening the oven, then check with a knife if the inside is cooked. Cooking times always vary, depending on the oven, how big your baking tray is...follow your instinct, listen to the voice inside your head. It's the baking angel talking.
If it is cooked, turn the oven off, leave the cake to rest for 10 minutes, and then pull it out to cool on a baking tray (take it out of the tray or it will "sweat" all the steam out and remain soggy on the bottom!).
Once cooled, have a taste, and if it's friends-worthy have a tea party!
November 9, 2009
Green Soup
 I've been asked to post some soup recipes, so let's start with an extremely simple and quick recipe. This soup is good if you want to have a very light meal, or if you want to accompany a more important meal with some soup. It's heating...and it's green!
Ingredients (for 2):
- olive oil
- fresh ginger
- 2 big courgettes/zucchini
- half a leak
- a bunch of turnip leaves
- salt to taste
- water
Equipment:
- a hand-held food blender
Heat some olive oil in a pot and add the leek to stir fry. Then add the chopped courgettes and the washed turnip leaves. You can leave it all in big chunks. Add the water, pinch of salt, and ginger (which you will have cut into smaller bits - the amount of ginger is up to you, I like to put quite a bit in because I love the taste and it is especially good in winter for building up the immune system. It also has very heating qualities). Bring to the boil, and when the courgettes are soft (after about 10-15 min), turn the flame off and blend it.
Told you it was easy! If you really want to show off you can toast some sunflower seeds and sprinkle them on top.
November 8, 2009
Simple Biscuits

These biscuits really are simple to make. I can give you rough guidelines as to quantities...as usual I just estimate the amounts, hoping it turns out.
Ingredients:
- 100 g of jaggery gour (this is the unrefined sugar that you will find in Indian shops or International Supermarkets). If you can't find it you could try replacing it with dark sugar or maybe Maple Syrup (remember that honey goes toxic when heated, and I've also heard some controversial stories about Agave....)
- 50 g of small oat flakes
- spelt flour: I didn't use much at all, and I guess it can pretty much be replaced with plain flour as well.
- olive oil
- a handful of raisins
- a teaspoon of ginger powder
- a teaspoon of cinnamon powder
- some tepid water
Preheat oven to 180 degress Celsius.
In a pot, place some olive oil and then add the oat flakes and jaggery gour. Keep stirring to get the gour to melt (it usually comes in hard balls). Add some water if necessary, and keep mixing so that it doesn't burn. Once it has all melted and mixed with the oats, place in a bowl and start adding a bit of flour.....sorry! I really don't know how much I used, but not much at all! Probably half a cup. Add some more olive oil and a little bit of water. Mix it all with a wooden spoon until it's a nice ball. You should be able to pick the "dough" up in your hand without it sticking to your fingers.
Make little balls and flatten them between your hands to get biscuit shaped shapes....and then place in the oven. They take roughtly half an hour to cook, just keep an eye on them, and when they look golden brown pull them out of the oven to cool.
I just tasted one and they're lovely because they're not too sweet at all.
I'm not a builder, but....
 We've been doing work in the house....well, we've paid someone to do work in the house, i.e. paint walls, build cupboards, drill things into the walls.
There's one little project, however, which I started working on yesterday evening, and am slowly moving ahead with it -- and I would like to share it with you for this reason:
If you have a set of stairs (of similar structure to mine) that you would like to personalise, OR you need to cover the steps but are reluctant to paying out loads of money for materials and for someone to do the work for you, then here's the solution. And this is obviously just one of the many options, but it gives you the right idea of how it can be done. As I said in the title, I am not a builder....this should be an encouragement to all!
Ingredients:
- white cement
- glass pebbles, stones, mosaic pieces...whatever tickles your fancy!
As you can see in the photo I've done alternate steps for now, but the effect is very pretty, and much nicer than the ugly lynoleum. I'm waiting for these steps to dry to then do the rest of the steps.
Again, I am not at all experienced with cement or any such material, so it really is a fluke that they've turned out like this. If you're an expert, you won't need me to tell you (as I have learned) that the consistency needs to be smooth, but not too runny. If it's too watery then you'll get little bubbles in the cement, even when it dries, and this makes it less compact....mmm....I have one "bad step"....we'll see what happens.
I'll be back with some recipes shortly! Autumn is a great season, and some of my favorite vegetables are coming soon!
September 11, 2009
...I'm back!....
It's been a long summer of silence....a summer that has extended into a very warm and sunny September.
There have been some sad goodbyes this summer: the Stevia plants, which were growing at an amazing speed, didn't survive the summer heat (or was it maybe my absence?), and have returned to Stevia heaven. My gorgeous chilli plant, which had given its first fruit at the beginning of the summer, is now no more than a long-lost memory.
My two basil plants, amorously sharing a single vase, are alive and well...but no longer with me! They are three floors up, at a lady's house - she kindly agreed to look after some of the herbs while I was away, and has now indirectly made us understand that we won't be getting them back.
On a more positive note, we do have some new additions: loads of origano, a gorgeously chirpy mint plant, another positively sturdy rosemary, and Jasmine (without "the" in front, as it's her name) being quite the show-off and stretching her bright green branches to distant corners of the terrace. Definitely the princess of the castle.
Other summer news is that I've become very good at badly playing the guitar, and that I'm joining belly dancing classes, which I would suggest to all (women), young and not-so-young. If you need to strengthen your back and increase mobility in your hips, then I'd say belly dancing is perfect....with Yoga of course ;)
I'll be back on soon with some new recipes! In the mean time, keep smiling!
There have been some sad goodbyes this summer: the Stevia plants, which were growing at an amazing speed, didn't survive the summer heat (or was it maybe my absence?), and have returned to Stevia heaven. My gorgeous chilli plant, which had given its first fruit at the beginning of the summer, is now no more than a long-lost memory.
My two basil plants, amorously sharing a single vase, are alive and well...but no longer with me! They are three floors up, at a lady's house - she kindly agreed to look after some of the herbs while I was away, and has now indirectly made us understand that we won't be getting them back.
On a more positive note, we do have some new additions: loads of origano, a gorgeously chirpy mint plant, another positively sturdy rosemary, and Jasmine (without "the" in front, as it's her name) being quite the show-off and stretching her bright green branches to distant corners of the terrace. Definitely the princess of the castle.
Other summer news is that I've become very good at badly playing the guitar, and that I'm joining belly dancing classes, which I would suggest to all (women), young and not-so-young. If you need to strengthen your back and increase mobility in your hips, then I'd say belly dancing is perfect....with Yoga of course ;)
I'll be back on soon with some new recipes! In the mean time, keep smiling!
July 14, 2009
Vegetable "Lasagna"
 This very simple dish manifested on the evening of my mother's birthday: I made another more elaborate "lasagna" for the rest of us, but since my mother is intollerant to almost everything I had to think of something "mummy-friendly".
Ingredients:
- aubergine (eggplant)
- potatoes
- rocket
- salt (I used herb salt)
- paprika
- origano
- olive oil
Quantities obviously depend on how many people you are preparing it for. I have made this dish twice, the first time was very thin, the second I added an extra layer of potatoes, and I must say it's better in the thinner version (more delicate). If you do want to add extra layers, I would suggest using the aubergine....or cutting the potato very very finely!
Preparation:
Prepare the aubergine and potatoes into thin slices, and chop up the rocket leaves (if you don't have rocket, red lettuce will do the trick wonderfully! I can't think of the name now...in italian it's "radicchio"). Turn the oven on: 180C.
Before starting the layering, grease the oven dish with some olive oil. Place the layer of potatoes, then sprinkle some herbal salt, paprika, and origano leaves (dried or fresh), and another drizzle of olive oil. Place the rocket leaves (put loads on! Don't worry, even if they look a lot, they will lose all their water and shrivel down to almost nothing!), and then the layer of aubergine (you can overlap the aubergines as they cook quickly...I put a couple of layers as the last layer), and sprinkle some olive oil, paprika and salt.
Place in the oven until cooked....mmm....30 minutes? 40 minutes? You can tell.....check that the potatoes are cooked.
The photo I put is of the second time I prepared it, when it was a bit thicker. The first time round I actually turned the whole dish over, so that the potatoes were on top....looked good.
 It's a really simple dish to prepare and the good thing is that you don't need to cook the vegetables before-hand. An extra note: I used the light colored aubergine in this dish, the round type. They're much better as they seem to remain more intact and more delicate than the darker longer type. You could also try adding zucchini (courgettes) to the dish....they would go really well! They'd be extra delicious if you grilled them first, which would make the whole preparation a bit longer....but if you have the time and heart to do it, then why not!
I will put the recipe for the other more elaborate version shortly....it's delicious!!!
July 9, 2009
Teeth and No Tears
I was sitting in a park yesterday elegantly enjoying my ice-cream, when I bit upon an especially crunchy piece of....piece of what? Was it a cone? Was it a hazelnut? NO! It was my tooth! Shiver quiver....I get chills down my spine at the mere thought of it! It wasn't my real tooth, but that famous piece of resin that acted as a replacement tooth after my fall in Ecuador (see the Teeth and Tears post for the full story).
This time I didn't shed a tear, nor did I experience any sort of emotion. I was actually on my way to the cinema and just thought I'd go to the movies and think about my half-tooth later on. I even took a photo of myself, mainly for the thrill I will get in seing my sister's look of horror when I show it to her.
My aunt had the good sense to tell me to call the dentist, who only had a free appointment next week OR within 15 minutes....so we jump into a taxi and rush off to the dentist! (missed out on the movie). One hour later I walked out with a "new" tooth, much better than the last job he'd done at sticking on my Ecuadorian piece of tooth (because I threw that one in the bin...I hope! I have a slight doubt I may have swallowed it). Point is I didn't bother looking for it...it's time was most definitely up.
Anyway, various things happened at the dentist, mainly regarding realisations about today's society: the main conclusion is that we have to become "everything-ologists". Let me explain: it's as though people do the bear minimum, minimum effort for (let's be truthful) extremely mediocre results. If, for example, you happen to break a tooth (and this is just an example), and your dentists works away at it for an hour and then asks you to look at it, do not think you're wrong in seing that he has done a very mediocre job, and DO direct him in his craft.
If, for example, you happen to break a tooth (and this is just an example), and you notice a little porosity where he (or she) has just been working, don't hesitate to ask him what (on earth!) it is....he may just fix it!...and in the end feel really happy about the job he's done. Well, good for him.
I hope you've managed to read between the lines.
As my philosophy teacher in India used to say, modern-day society produces INSTRUMENTS: a million knives, a million forks, a million torches, a million lawyers, etcetera, etcetera....A lawyer is no grander in scope than a knife is at doing its job. So if and when we choose to put ourselves in the hands of instruments, I wouldn't do it with the blind faith and surrender that our grandparents may have had. An instrument must be put to good use. We must somehow become "everything-ologists", and develop at least a questioning power - not to become doubtful and overquestioning cynical meanies, but to have the awareness that instruments will, if allowed, do the bear minimum.
This time I didn't shed a tear, nor did I experience any sort of emotion. I was actually on my way to the cinema and just thought I'd go to the movies and think about my half-tooth later on. I even took a photo of myself, mainly for the thrill I will get in seing my sister's look of horror when I show it to her.
My aunt had the good sense to tell me to call the dentist, who only had a free appointment next week OR within 15 minutes....so we jump into a taxi and rush off to the dentist! (missed out on the movie). One hour later I walked out with a "new" tooth, much better than the last job he'd done at sticking on my Ecuadorian piece of tooth (because I threw that one in the bin...I hope! I have a slight doubt I may have swallowed it). Point is I didn't bother looking for it...it's time was most definitely up.
Anyway, various things happened at the dentist, mainly regarding realisations about today's society: the main conclusion is that we have to become "everything-ologists". Let me explain: it's as though people do the bear minimum, minimum effort for (let's be truthful) extremely mediocre results. If, for example, you happen to break a tooth (and this is just an example), and your dentists works away at it for an hour and then asks you to look at it, do not think you're wrong in seing that he has done a very mediocre job, and DO direct him in his craft.
If, for example, you happen to break a tooth (and this is just an example), and you notice a little porosity where he (or she) has just been working, don't hesitate to ask him what (on earth!) it is....he may just fix it!...and in the end feel really happy about the job he's done. Well, good for him.
I hope you've managed to read between the lines.
As my philosophy teacher in India used to say, modern-day society produces INSTRUMENTS: a million knives, a million forks, a million torches, a million lawyers, etcetera, etcetera....A lawyer is no grander in scope than a knife is at doing its job. So if and when we choose to put ourselves in the hands of instruments, I wouldn't do it with the blind faith and surrender that our grandparents may have had. An instrument must be put to good use. We must somehow become "everything-ologists", and develop at least a questioning power - not to become doubtful and overquestioning cynical meanies, but to have the awareness that instruments will, if allowed, do the bear minimum.
June 8, 2009
Chocolate-chip Muffins!
.JPG) Today is the first day of a new era: no more amateur baking, no more guessing amounts - this time I followed the recipe, for real. And I finally got a good result! I even went out and bought scales: past baking nightmares have taught me that "more or less" doesn't quite work.
Today is the first day of a new era: no more amateur baking, no more guessing amounts - this time I followed the recipe, for real. And I finally got a good result! I even went out and bought scales: past baking nightmares have taught me that "more or less" doesn't quite work.I got this recipe for Chocolate-Chip Muffins from Vera's blog, they're really easy to make and if you follow the recipe you will get nice soft muffins. If I got them, then you will too because I am far from having the baking finger.
I picked out the best ones for the picture up above...ha ha! But this is what t he rest of them looked like! Lesson learnt. Do not overfill the muffin cups. I used paper muffin cups because I refuse to use alluminium in my kitchen. The alluminium ones are sturdier, but since we're on our way to a generally healthier life, let's steer well away from using it! The paper ones work fine but, as I just mentioned, be careful not to overfill them, or your muffins will look more like...run-away muffins. Or overly-affectionate muffins, trying to get close to the other muffins and coming together in some bakery version of holy matrimony.
If they do turn out like this, we may then adopt the philosophy of not judging a book by its cover, and that should have you covered.
 he rest of them looked like! Lesson learnt. Do not overfill the muffin cups. I used paper muffin cups because I refuse to use alluminium in my kitchen. The alluminium ones are sturdier, but since we're on our way to a generally healthier life, let's steer well away from using it! The paper ones work fine but, as I just mentioned, be careful not to overfill them, or your muffins will look more like...run-away muffins. Or overly-affectionate muffins, trying to get close to the other muffins and coming together in some bakery version of holy matrimony.
If they do turn out like this, we may then adopt the philosophy of not judging a book by its cover, and that should have you covered.
Ingredients:
- 300 g flour "00"
- 50 g potato starch
- 1/2 packet of cremor tartar
- 100 g cane sugar
- 300 ml of rice/soya milk
- 5 teaspoons maize oil
- 1/2 teaspoon bicarbonate soda
- 1 tablespoon of apple vinegar (or white wine vinegar)
- chocolate drops (as many as you like!)
Turn on oven to 170 degrees. Sieve the dry ingredients and mix them together: flour, potato starch, cremor tartar, sugar, bicarbonate soda. Pour in the wet ingredients and mix with a wooden spoon, and then add the vinegar and chocolate drops. Fill your muffin cups to 3/4....or a little less. I thought I'd filled mine up 3/4 - I should maybe reconsider my understanding of "three quarters".
Place in oven for 30 minutes, then check with a knife/stick: if they're dry, turn the oven off and let them rest for a few minutes, and then pull them out to cool.
And since you've gone to all this effort, you may as well taste one! Mmmmm....I've already eaten two. Insatiable....I'm going back for more!
June 4, 2009
Nutty-Choco "Ice-Cream"

I'll blame the summer mood for this excessive production of cold desserts - I don't know if anyone's been experimenting with the frozen banana-base, but I certainly have! And here's today's result. Scrumcious! Quite moossey as well.
Ingredients:
- 2 frozen bananas
- handful of almonds
- handful of walnuts
- handful of hazelnuts
- 3 pitted dates
- Agave syrup
- bitter cocoa powder
- for extra naughtiness: dark chocolate (without milk powder to maintain the dessert vegan)
- a liquid base: can be grape juice if you want to keep it gluten-free, or rice/almond/soya milk.
The procedure is always the same: peel the bananas and place them in plastic wrap in the freezer for about three hours or until frozen. In the mean time, soak the nuts in the juice or milk for the same amount of time.
Once the bananas are frozen, cut them up and place them in a food processor with the rest of the ingredients. I didn't really measure: I guess a couple of tablespoons of cocoa powder, plus a little more for good luck. Agave syrup....mmm....I just put it in. You don't need much: the bananas and dates are already sweet, but a little syrup is good to contrast the bitter cocoa powder. Add the rest of the ingredients and start woozzing...oh! Also MUST add (before woozzing) about half a cup of juice/"milk" - this is always to save your blender, and to give the ice-cream a smooth consistency.
Don't forget the extra touch! Dark chocolate: cut it up a bit before hand and then give it a last woozz once the whole thing has already reached a smooth consistency.
I think you'll be pleasantly surprised with the result! Might be nice to sprinkle some coconut flakes on top at the end...or not. May as well be 100% decadent while you're at it!
May 28, 2009
Strawberry Sorbet!
 You must all prepare this, you will be shocked by the smooth consistency of this sorbet! And all without an ice-cream machine!
(Sorry about the photo...I was blinded by the sun - and yes, I take all my photos on the same table..haha!)
Ingredients:
- 2 ripe bananas
- a punnet of strawberries
- Agave: about half a small cup?
- either juice (apple or grape), or rice milk
Peel the bananas, wrap them up in glad wrap and place in the freezer. Wash the strawberries, take the green part off and freeze them as well (place them in a plastic tupplewear container).
After about 3 hours, the fruits will be frozen: cup up the banana into chunks and place in a food processor. Start off with a just a bit of banana and a bit of strawberries....they're frozen so you don't want to destroy your food processor or its blade. Add the juice/rice milk straight away, and start blending. As you see that it gains a smooth cremy consistency, slowly add the fruit that was left out, as well as the Agave.
Isn't it amazing? Mine has quite a fizzy flavor...I think it's the strawberries that did it. You can add or diminish Agave quantities depending on how sweet you like it....but don't ruin it with sugar!
 Serving Suggestions: if you're preparing it for friends, try and prepare it almost on the spot - I've placed mine in the freezer, but I'm pretty sure it will turn into a frozen block of sorbet. So better to prepare and consume immediately! (or place it in the fridge if it's going to be consumed within a short time after preparation).
May 27, 2009
Frozen Avocado Cake
 What a find! I was browsing through the net for some raw recipes, and this is what I tumbled on. It's really easy to make, and the taste is not bad either!
Ingredients:
- 1 ripe avocado
- 1/4 cup of coconut oil
- 1 tablespoon of lime juice
- 1 tablespoon of Agave
Crust: 1 part nuts, 1 part dates.
Firstly place the pitted dates and whatever nuts you like into the food-processor, to get them nicely chopped. Then place the lot into a plastic container (you're going to have to put it in the freezer, so avoid glass). Press it down evenly with a spoon.
Process the avocado with the rest of the ingredients until all the avocado has "creamyfied", and then put it on top of the "crust" part. Place a lid on the plastic tin (I used a plastic lunch-box, or tupplewear, as snobby people like to call it), and place in the freezer.
It will take a few hours to freeze: when it's ready you can pull it out and tip it over (like I've done in the photo above)....looks prettier with the crust on top - the eye plays it's part!
Subscribe to:
Posts (Atom)


